ADTF Project Tutorial
This guide covers creating a new ADTF Project using custom Filters. After reading this guide you will know:
- the structure of an ADTF Project
- how to create an ADTF Project using the Configuration Editor
- how to include custom Filters in your ADTF Project
- how to create ADTF Graph files
- how to create ADTF Session files
- how to create ADTF System files
Where are we?
In Data Generator Filter
we created a Filter that can generate velocity and yaw rate data samples
and forward them to a data sink or another Filter.
In Data Processor Filter
we created another Filter that takes velocity and yaw rate data samples,
uses them to calculate a kappa value and logs some values to the console.
Now we want to combine those two Filters. We want our Data Generator Filter
to generate data samples and send them to our Data Processor Filter
that processes them. To accomplish this we create an ADTF Project.
Add our new Filters to the Configuration Editor
First of all we need to start the Configuration Editor.
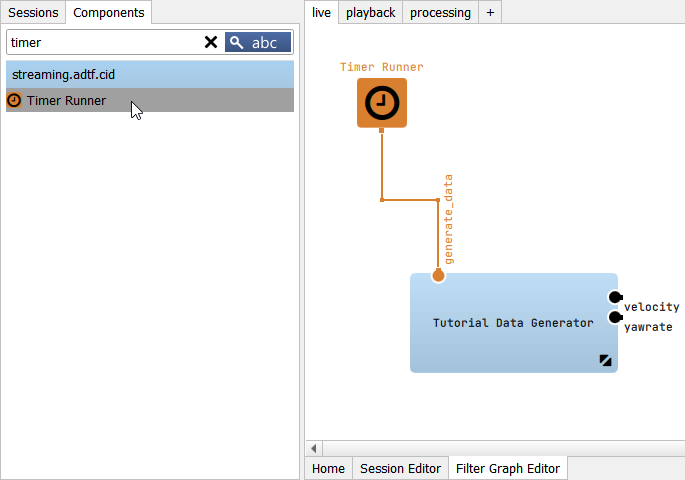
Before we can use our custom Filters we need to tell the Configuration Editor where to find them.
Therefore we select the Tools menu and open the Options dialog and extend the entry Plugin directories
by adding the directories where the Filters (and their describing *.plugindescription files) are located, e.g.:
- {ADTF_DIR}\src\examples\bin\debug
- {ADTF_DIR}\src\examples\bin\debug
Components tab.
Note that the PluginsandPlugins (Debug)categories of theSystem Editorautomatically reflect the new dependencies.
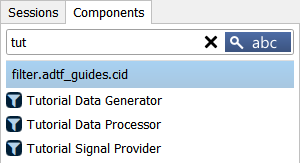
Now the Filters located at the added plugin directories should be visible in the Components tab of the Configuration Editor. You can also
use the search field for a better overview:
Create an ADTF Project
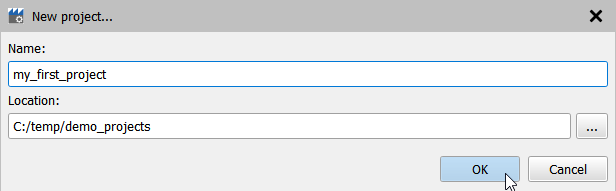
We choose File->New Project and enter a name and a location
for our project in the upcoming window.
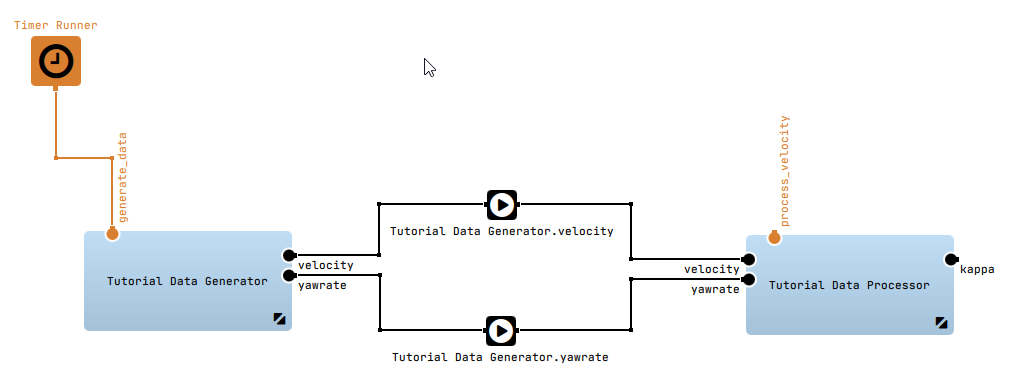
Drag and drop our new Filters from the ADTF Components tab into the Filter Graph.
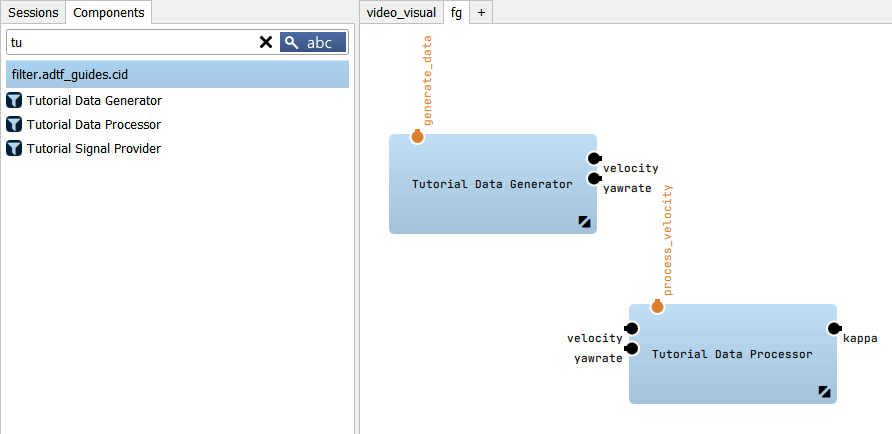
We want to generate velocity and yaw rate data samples. Therefore we need
a Tutorial Filter Data Generator.
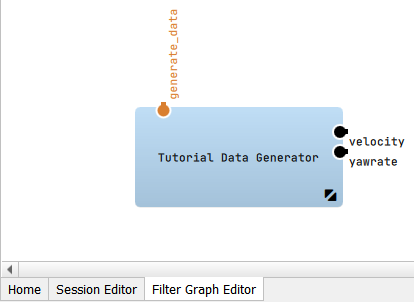
To trigger our Data Generator we need a Timer Runner
connected to them. First Drag and Drop a Timer Runner from the
Components tab into the ADTF Graph window. And then connect the bottom of the
Object with the Data Generator.
Now we add a Data Processor and connect it to our Data Generator
using two Sample Streams.
Since ADTF 3.7.0 Sample Streams or Binding Proxies are added automatically when connecting the related pins of the ADTF Components. The only restriction is between two dynamic pins. In this case, the Sample Stream / Binding Proxy has to be added manually. To enable/disable this option go to Tools - Options - Graph Editor
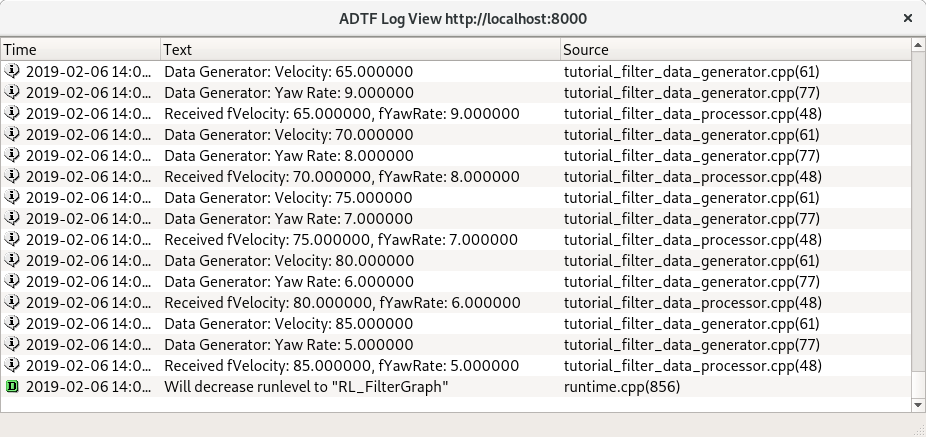
We finished creating our first ADTF Project. We can run the default_session in the Sessions view.
To do so right click it and choose "Launch with ADTF Console". Run the ADTF Session by typing "rl running" into the cmd. If everything
is setup correctly, the produced velocity and yaw values should be logged to the console.
Now we can start debugging our Filters using Visual Studio and the Configuration Editor.
Where to go next?
Have a look at the Filter Debugging Tutorial to learn how to debug your custom Filters in Visual Studio.